Go Back   Cruiser Log World Cruising & Sailing Forums > Cruising Forums > General Cruising Forum
Cruiser Wiki Click Here to Login

Join Cruiser Log Today

Reply
 
Thread Tools Search this Thread Display Modes
 
Old 01-14-2013, 06:12 AM   #1
Rear Admiral
 
Join Date: May 2008
Posts: 333
Default Bronze ball valves - in water replacement

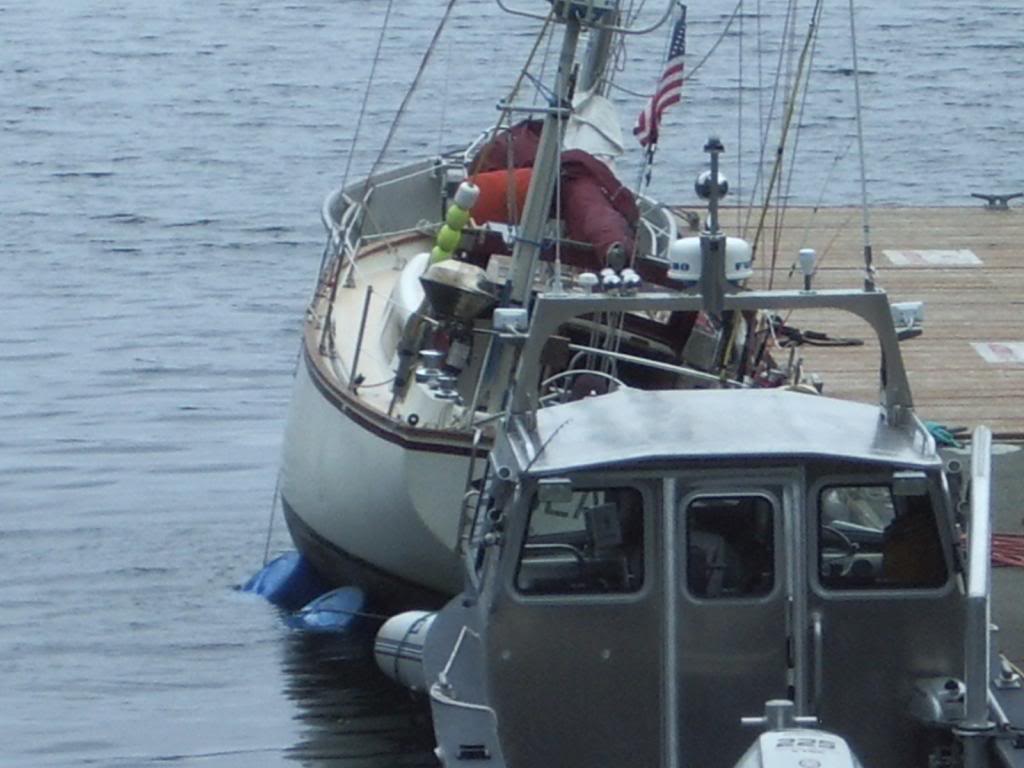
I think I've mentioned that the closest haul out facility for Australis is Kudat, about 4 days sailing north to the top of Borneo.

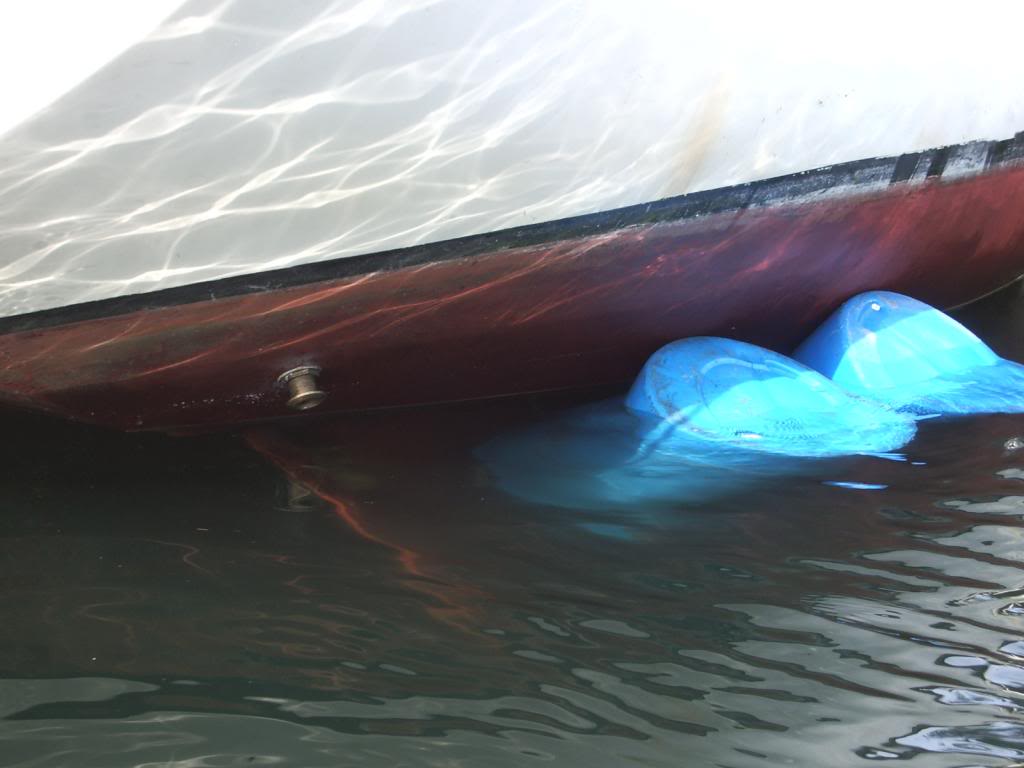
The anti foul and prop are still in very good condition and the only reason I'd be taking that long haul would be to replace all the ball valves and skin fittings (circa 2008)

A few are seized whilst others are stiff and it's usually the first thing we replace when purchasing a new vessel.

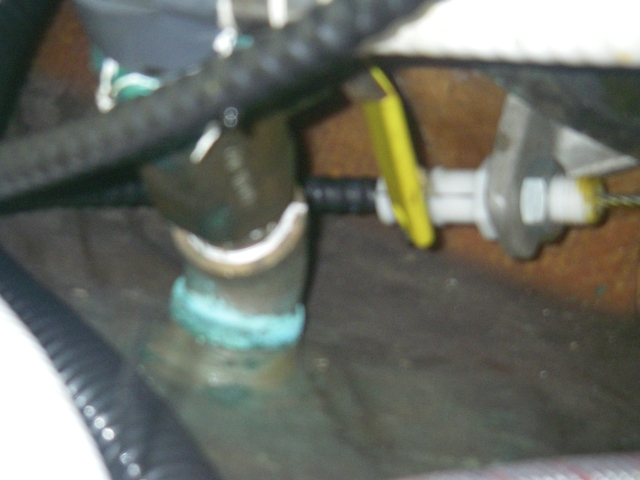
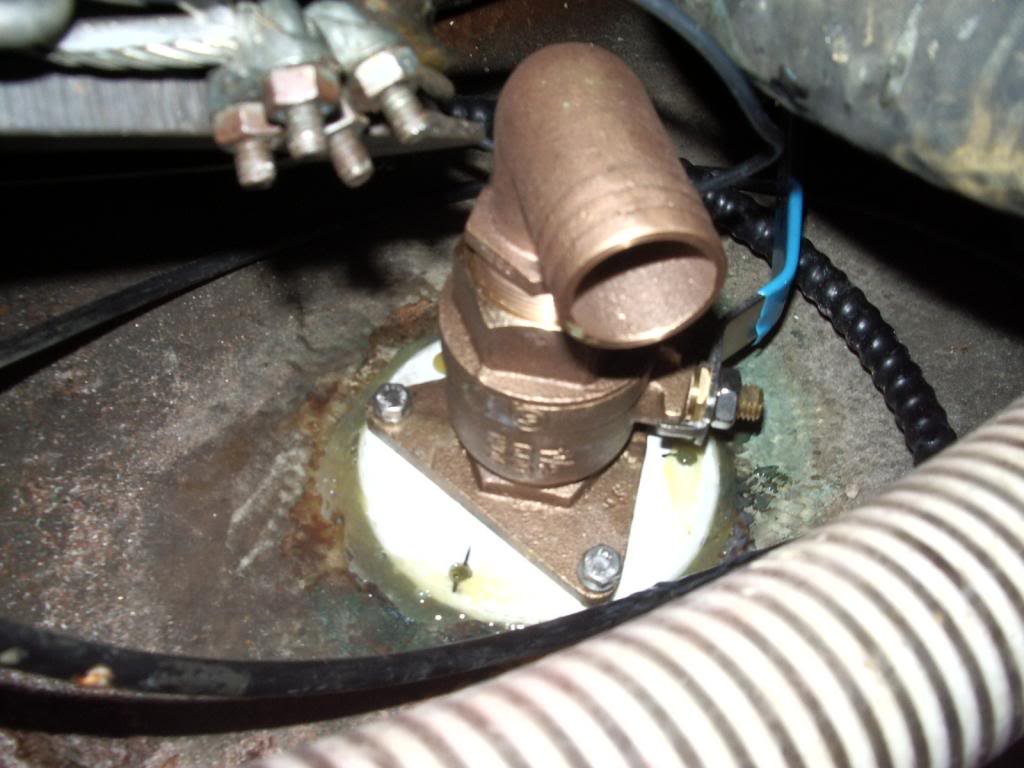
Both the through holes and valves are bronze and after our recent success of refurbishing the stuffing box whilst still in the water, I'm contemplating attempting the same with the ball valves at least.

Obviously I can't do anything about the through hole fittings but I figure that if we block the outside and take our time and use a bit of care and not force things, we may just be able to unscrew the old ball valves without shifting the through holes.

We'd then replace the through holes towards the end of this year when we have time to go to Kudat. At least we'd have some comfort knowing that the ball valves are all working and secure until then.

Well that's the plan and we all know what happens to those!

Like most, I've shared the frustration of having to cut, grind and hammer off a ball valve and corroded skin fitting - usually S/S . That's certainly not going to happen in the water this time, but I have recently received a few comments about Bronze through holes becoming brittle with age and that we could very well shatter one if we are not careful.

Has anyone in the forum tackled an in water job like this before?

Fair winds,


Australis II
__________________

__________________
mico is offline   Reply With Quote
Old 01-14-2013, 03:00 PM   #2
Moderator
 
FrankZ's Avatar
 
Join Date: Jul 2011
Home Port: Baltimore
Vessel Name: Bellesa
Posts: 155
Default

I have done some work on the valves in the water. My nearest haul out is 100 yards from my slip and he is pretty good about being available in cases of emergency, especially if you warn him ahead of time.

Personally I would be disinclined to do this kind of work in water without a way to get the boat out if things went badly. I understand the desire to replace them, but if they are keeping the water out and don't look like they are in imminent danger of failing I wouldn't go breaking things.

I was removing a old transducer after we got Bellesa. When I turned the backing ring it disintegrated and I could push the transducer out the bottom. I can't imagine how stressful that would have been in the water if I had mucked with it and caused that large of a hole.
__________________

__________________
Sing to a sailor's courage, Sing while the elbows bend,
A ruby port your harbor, Raise three sheets to the wind.
......................-=Krynnish drinking song=-
FrankZ is offline   Reply With Quote
Old 01-16-2013, 04:55 AM   #3
Ensign
 
Join Date: Aug 2009
Posts: 2
Default

I have done quite a bit of in the water or on the beach boat repair. I changed two complete mushrooms and upgraded to legitimate seacocks complete with composite backing plates in the water. For this repair I lashed some plastic 55 gallon drums to the hull and then filled them with air to lift and heel the boat. For the remainder of heel I used a halyard tied off to the dock. Both seacocks and backing plates had full recommended cure time before re-submersion.
Personally I would do this again, however I suspect most marinas would frown on the activity. Never felt out of control and had all the time I needed. Other than these I have replaced (in the water) the rudder, shaft packing, and while on the beach during a singe tide cycle the engine intake, shaft, stuffing box upgrade to mechanical seal, and zincs of course! I did once replace a failed hardware store variety ball valve in the water by using a plug on the outside of the hull. I did this in Hawaiian waters and probably wouldn't attempt it here in Alaska unless it was an emergency. Proper planning is essential during these evolutions, but it is equally important in the yard. Seen plenty of travel lift oopsies and yard accidents. Seen some pretty fat yard bills too!

Image below shoes fitting during the cure stage where I used the mushroom at full length with it's locking nut to apply compression to the backing plate while the epoxy cures


Before:


After: (flange bolts threaded into backing plate)
__________________
svseaya is offline   Reply With Quote
Old 01-16-2013, 08:23 AM   #4
Rear Admiral
 
Join Date: May 2008
Posts: 333
Default

wow!

I think I can confidently say that's the most innovative solution to in-water replacement I have ever seen.

Unfortunately you're right about frowning marinas. I got a note left in our cockpit from the marina about moving a chair on the jetty and using the jetty T section to fold up our headsail for bringing back to oz It only took 10 minutes

Even so - the first thing I'll be doing when I get back to Borneo will be checking out just how far below the water line my valves are. Perhaps I could do it by torch light after the office has closed

Thanks for the pics

Fair winds ,

Australis
__________________
mico is offline   Reply With Quote
Old 01-16-2013, 03:33 PM   #5
Moderator
 
FrankZ's Avatar
 
Join Date: Jul 2011
Home Port: Baltimore
Vessel Name: Bellesa
Posts: 155
Default

Quote:
Originally Posted by svseaya View Post
I have done quite a bit of in the water or on the beach boat repair.
Very impressive. I would never do it. I am the guy that can get the 6 hour job done in 3 unless I have to then it takes 12. I would forget something really important...

Quote:
Originally Posted by mico View Post
Unfortunately you're right about frowning marinas. I got a note left in our cockpit from the marina about moving a chair on the jetty and using the jetty T section to fold up our headsail for bringing back to oz It only took 10 minutes

Ouch. My marina manager... umm.. helps me fold the sail, and move things out of the way so I can have room.
__________________
Sing to a sailor's courage, Sing while the elbows bend,
A ruby port your harbor, Raise three sheets to the wind.
......................-=Krynnish drinking song=-
FrankZ is offline   Reply With Quote
Old 01-17-2013, 01:52 AM   #6
Nicholson
 
Nicholson58's Avatar
 
Join Date: Nov 2012
Home Port: Grand Rapids
Vessel Name: ROXY
Posts: 13
Default

How to Get An 85 Ft Mast Under A 65 Ft Bridge - YouTube

this is the way to do it.
__________________
Nicholson58 is offline   Reply With Quote
Old 02-23-2013, 02:41 AM   #7
Ensign
 
Join Date: Sep 2012
Home Port: Elephant Butte
Posts: 10
Default

Kudos to Svseaya and Nicholson!! I am curious, Nicholson, about how you controlled the angle of heel? Svseaya What is the displacemnt of your boat and how many barrels did you use? Just 2?
__________________
DON'T PANIC!

S/V Isabelle
Columbia 36 MkI
Coltex is offline   Reply With Quote
Old 02-24-2013, 03:53 PM   #8
Nicholson
 
Nicholson58's Avatar
 
Join Date: Nov 2012
Home Port: Grand Rapids
Vessel Name: ROXY
Posts: 13
Default

Quote:
Originally Posted by Coltex View Post
Kudos to Svseaya and Nicholson!! I am curious, Nicholson, about how you controlled the angle of heel? Svseaya What is the displacemnt of your boat and how many barrels did you use? Just 2?
You need to set the bags at the correct halyard length. There is a tag line form the bags to the mast. As you let off slack on the tag line, the boat will heel until the water bag is neutral in the water. Once the bag is in this position you know the length of line to the top of the mast is correct. No geometry required. Once past the bridge, crank the bags towards the mast an the boat will stand up.

We are 55000 disp and 58 feet. I have not yet done this but I believe the boat in the video to be about our size.
__________________
Nicholson58 is offline   Reply With Quote
Old 02-24-2013, 05:38 PM   #9
Ensign
 
Join Date: Sep 2012
Home Port: Elephant Butte
Posts: 10
Default

Ah ok I didnt see the the line back to the mast, just the halyard. I will definitely have to get a couple more righting bags and play with that a bit. Thanks very much for the info!
__________________

__________________
DON'T PANIC!

S/V Isabelle
Columbia 36 MkI
Coltex is offline   Reply With Quote
Reply


Currently Active Users Viewing This Thread: 1 (0 members and 1 guests)
 
Thread Tools Search this Thread
Search this Thread:

Advanced Search
Display Modes

Posting Rules
You may not post new threads
You may not post replies
You may not post attachments
You may not edit your posts

BB code is On
Smilies are On
[IMG] code is On
HTML code is Off
Trackbacks are Off
Pingbacks are Off
Refbacks are Off


Similar Threads
Thread Thread Starter Forum Replies Last Post
Salt Water Tap Replacement linnupesa Other Equipment 17 03-04-2011 05:09 AM
Plumbing Supplies, Valves, Stopcocks, Etc. delatbabel Other Equipment 1 07-10-2008 11:07 PM

Our Communities

Our communities encompass many different hobbies and interests, but each one is built on friendly, intelligent membership.

» More about our Communities

Automotive Communities

Our Automotive communities encompass many different makes and models. From U.S. domestics to European Saloons.

» More about our Automotive Communities

RV & Travel Trailer Communities

Our RV & Travel Trailer sites encompasses virtually all types of Recreational Vehicles, from brand-specific to general RV communities.

» More about our RV Communities

Marine Communities

Our Marine websites focus on Cruising and Sailing Vessels, including forums and the largest cruising Wiki project on the web today.

» More about our Marine Communities


All times are GMT. The time now is 09:37 PM.


Powered by vBulletin® Version 3.8.8 Beta 4
Copyright ©2000 - 2024, vBulletin Solutions, Inc.
SEO by vBSEO 3.6.0
×