 |
|
 03-09-2009, 07:23 PM
|
#1
|
|
Admiral
Join Date: Jan 2007
Vessel Name: Persevate
Posts: 548
|
Anyone have any experience with DIY hull painting... I've read a few articles online and am aware of the necesity to de-wax, sand, and use a tie coat/primer but what I'm wondering is what actual paint application techniques you might have used to get a good finish and avoid a stripled/orange peel finish. One site mentioned going back over the surface with a foam brush after rolling on...
Any inputs?
also, if you've hired a hull painting I'd be interested to know what you might have paid and if you were happy with the finished product.
thanks,
J
__________________
__________________
“The world turns aside to let any man pass who knows where he is going.” (Epictetus 55 - 135 AD)
"To see new things, and live day to day, is better than wine or poppy, and fitter for a man." (Theseus)
|

|

|
 03-09-2009, 09:09 PM
|
#2
|
|
Moderator
Join Date: Jun 2007
Home Port: Washington DC
Vessel Name: SV Mahdee
Posts: 3,236
|

Having just painted our hull above the waterline, I can tell you its a big project but not hard. The technique used, unless you're going to spray the paint, is referred to as "roll and tip." There is a good article about a couple who paint their own boat, using this technique, in a recent issue of Good Old Boat, btw.
The hardest "risky part" for me was defining the waterline and taping it out since the hull is newly planked there's no waterline scribed on it. Forget the usual methods--use a surveyors laser. 
Typically it takes two people to roll-and-tip: One uses a lint-free (e.g. foam) roller to apply the paint while the other person makes deft use of a brush lightly "tipping" the paint to get rid of the roller marking. Depending on the paint used, the self leveling will help render a very smooth surface.
In my case, I did the roll and tip by myself. My husband is an awful painter and I just didn't have anyone else that I really trusted to help me out. It's harder by yourself as you can't stop once you start you've got to keep moving from bow to stern or you'll have start/stop lines showing. If you've never painted (at your house, parents and friends places, etc) don't do this by yourself; in such case you need to be the "roller" dude in that case and let someone else with a steady hand do the "tipping" part.
We have a newly planked wood boat--and know that on our first haul out next year we'll be re-fairing the hull as it will have moved quite a bit since planking--thus my paint job is only a 1-year job--this entirely took the worry out of the project for me 
Because our planks were brand new Sapele, I sealed the wood with three coats of Smith's CPES (seal to saturation), then I put three coats of a Z-Spar (105 undercoat) high-fill primer in place. Those coats were rolled on, not tipped. Then, I sanded the primed hull and wiped it down with Acetone. It was very smooth. Then, I put on three light coats of the topcoat paint (roll and tip). Sanded after coat three to get rid of any brush marks, wiped it down with Acetone and then put the final coat on. So,when all is said and done, there are 7 coats on the boat. Mild brush strokes here and there but I'm happy with it.
Because of knowing that we'll re-fair and re-paint in a year, beyond the Z-Spar primer, I used a paint that is suitable as a primer coat (for next year) and as a topcoat (for now). It was Kush Marine Paint w/eggshell finish. When we do the final paint job, I'll pay someone to help me and use a Kush Marine Paint semi-gloss that is more washable than the eggshell will prove to be. With a fiberglass boat, you can use a hard LP paint or just about anything you desire. With our traditional planked boat, we're sticking with a traditional lower gloss paint. The Kush Marine Paint is easy to apply and very reasonably priced and has a side benefit of being able to be tinted any Benjamin Moore color as the Kush company is also a Benjamin Moore paint dealer.
Before painting, you'll have to assess the condition of the existing topsides paint and decide if you're going to remove it or simply sand and paint over it. The removal of the old paint is sort of a pain but might have to be done if it's in poor condition. Depending on the type of bottom paint you've got, you might be removing it, too, before putting on your final bottom paint.
I'm using a two-part epoxy bottom paint (Coppercoat by Aquarius Marine in the UK) that takes two to apply (one to mix and one to apply the paint) so I'll be paying a fellow to help me do that next Monday, Tuesday, Wednesday. Will let you know how that goes afterwards 
Good Luck!
|

|

|
 03-10-2009, 03:13 PM
|
#3
|
|
Admiral
Join Date: Jan 2007
Vessel Name: Persevate
Posts: 548
|
thanks for the response... I'm actualy intent on coppercoating the bottom as well... please do let me know how it goes... unfortunately coppercoat will only be FDA approved in Florida next month... hopefully it will spread fast but if not I'll have to wait till next season when I plan on sailing down that way.
__________________
“The world turns aside to let any man pass who knows where he is going.” (Epictetus 55 - 135 AD)
"To see new things, and live day to day, is better than wine or poppy, and fitter for a man." (Theseus)
|

|

|
 03-10-2009, 04:01 PM
|
#4
|
|
Moderator
Join Date: Jun 2007
Home Port: Washington DC
Vessel Name: SV Mahdee
Posts: 3,236
|

Quote:
Originally Posted by atavist

thanks for the response... I'm actualy intent on coppercoating the bottom as well... please do let me know how it goes... unfortunately coppercoat will only be FDA approved in Florida next month... hopefully it will spread fast but if not I'll have to wait till next season when I plan on sailing down that way.
|
You can buy Coppercoat directly from Aquarius Marine in the UK. They've been selling it to folks here in the USA for a number of years. Not cheap, but easy to do. It's not the Food and Drug Administration (FDA) that approves it--it's the Environmental Protection Agency (EPA). They've been saying it will be approved for broader sale in the USA for more than 3 years now. Suggest that if you want it--just buy it directly from the UK company.
The bottom has to be completely bare of other bottom paint in order to use it--a big hassle unless you're stripping the bottom paint off anyway or like in our case where we had brand new planking. Just stripping and prepping the deadwood, keel, and lead keel was a hassle for us. The cost is also fairly high. Its worthwhile on a larger or heavier boat if you can limit haul outs but the cost effectiveness of it may decrease with a smaller boat that is easy to get hauled out in most places and use a more traditional bottom paint with.
|

|

|
 03-10-2009, 06:04 PM
|
#5
|
|
Lieutenant
Join Date: Jan 2008
Home Port: Hull
Vessel Name: Tadpole
Posts: 63
|

You don't mention whether your boat has a fibreglass hull or wood ? ... either way the process is very similar although the type of paint used would differ for grp or wood ... the end result (finish & lustre) is highly dependant on surface preparation (smooth start equals a smooth finish) & do not forget to de-wax/de-grease before any paint is applied ... if your hull has been painted before (as opposed to gelcoat - previously unpainted) then check that your new paint is compatible with the existing coat (paints of different chemical types are often incompatible & may react badly or "pickle") ... many types of paints are available depending on who dominates the market where you are, for wood most people prefer traditional oil-based paints whilst for grp most go for a one-pack or two-pack polyurethane or acrylic ... application can be by spray, brush or roller whilst ambient temperature & humidity conditions must be borne in mind ... follow the paint manufacturer's instructions including type of undercoat, thinners & cleaning solvents ... be aware that some types of paints release harmful fumes, especially when spraying ... wearing a mask & protective clothing is advised not only whilst painting but also whilst sanding & prepping ... various methods can be employed to achieve a good finish (including roll & tip if you have an assistant) my preference is to brush paint & sand between coats, applying sufficient coats to ensure a good thickness of paint, then, when it has completely cured & hardened, wet-sand with extremely fine wet-or-dry paper on a rubber block until all brushmarks are smoothed out ... finally buff thoroughly with cutting compound & buffing paste to achieve a high lustre ... keep the hull adequately waxed for a long lasting result.
Sound complicated ? ... it need not be although it can be hard work ... not surprisingly, many boatowners leave this kind of work to a professional.
__________________
|

|

|
 03-10-2009, 07:40 PM
|
#6
|
|
Moderator
Join Date: Jun 2007
Home Port: Washington DC
Vessel Name: SV Mahdee
Posts: 3,236
|
Quote:
Originally Posted by svtadpole

my preference is to brush paint & sand between coats, applying sufficient coats to ensure a good thickness of paint, then, when it has completely cured & hardened, wet-sand with extremely fine wet-or-dry paper on a rubber block until all brushmarks are smoothed out ... finally buff thoroughly with cutting compound & buffing paste to achieve a high lustre ...
|
Hey, I have a question regarding this buffing--I noted how lovely the between-coats looked when I sanded and I did wonder if I could simply wet sand the final coat and then buff to get a level of lustre that was pleasing. Even if I didn't wetsand, it seems that after roll and tip work that buffing would always help even out the final sheen. Really appreciate your opinion 
FYI, In our case, its a traditionally planked wood boat. In Atavist's case, the boat is strip planked w/fiberglass over it--a cold molded boat.
|

|

|
 03-10-2009, 10:41 PM
|
#7
|
|
Admiral
Join Date: Jan 2007
Vessel Name: Persevate
Posts: 548
|
I think i like this method... paint, sand, repeat.... buff.. easy enough... I've done a lot of painting but never done roll and tipping... not to mention it will be just me doing all the work...
cheers.
__________________
“The world turns aside to let any man pass who knows where he is going.” (Epictetus 55 - 135 AD)
"To see new things, and live day to day, is better than wine or poppy, and fitter for a man." (Theseus)
|

|

|
 08-30-2009, 11:13 AM
|
#8
|
|
Commander
Join Date: Oct 2007
Posts: 127
|
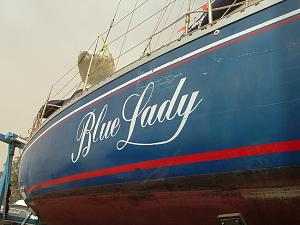
Well Blue Lady comes out of the water on the 23rd of September for a hull repaint. The blue hull is quite oxidised and very worn. There is a significant scarfing at the bow from the previous owner allowing a mooring line to rub quite heavily on the port bow.
We are using two pack polyurethane. We are using roll and tip method.
Just wondering if anyone has any new tips or ideas or even techniques that should be considered before this task begins.
Cheers
Rob & Annette
S/V Blue Lady
__________________
|

|

|
 08-30-2009, 04:23 PM
|
#9
|
|
Moderator
Join Date: Jun 2007
Home Port: Washington DC
Vessel Name: SV Mahdee
Posts: 3,236
|

Quote:
Originally Posted by Qldcruiser

Well Blue Lady comes out of the water on the 23rd of September for a hull repaint. The blue hull is quite oxidised and very worn. There is a significant scarfing at the bow from the previous owner allowing a mooring line to rub quite heavily on the port bow.
We are using two pack polyurethane. We are using roll and tip method.
Just wondering if anyone has any new tips or ideas or even techniques that should be considered before this task begins.
|
Assume it is a fiberglass hull. If so, and mooring line has eaten into the gelcoat, you may wish to do an epoxy or gelcoat repair first before painting as the paint is only a protective top coat but the gelcoat is needed for the overall integrity of the boat. Is it a cored hull or solid at that location? If cored, even more important to do a good repair before painting.
The two-part LP paints really turn out wonderfully if that's what you're using should be great. Ummm...buffing and removing waxes and all before starting is of course important. The vendor will have specific instruction regarding that matter.
Good luck to you 
|

|

|
 08-30-2009, 09:09 PM
|
#10
|
|
Commander
Join Date: Oct 2007
Posts: 127
|
Yes, she is a solid hull. I am using a sealer coat to ensure that the gel coat is sealed, then two hi-fill primer u/c and then 2 to 3 top coats in a Tasman Blue which is a very deep blue.
Cheers
Rob & Annette
S/V Blue Lady
__________________
|

|

|
 09-01-2009, 04:27 PM
|
#11
|
|
Admiral
Join Date: Jan 2007
Vessel Name: Persevate
Posts: 548
|
speaking of dark colored hull paints...
I've heard that painting a white boat (manufactured as such) a dark color can have adverse affects on the strength of the boat due to the increased heat absorption... this probably only applies to older boats with older formula resins... or is it a wives tale??
__________________
“The world turns aside to let any man pass who knows where he is going.” (Epictetus 55 - 135 AD)
"To see new things, and live day to day, is better than wine or poppy, and fitter for a man." (Theseus)
|

|

|
 09-01-2009, 04:34 PM
|
#12
|
|
Admiral
Join Date: Sep 2005
Posts: 1,619
|
It certainly appplies to wooden boats. Paint a white boat black or dark blue and the wood dries out opening the seams. I saw this happen on an old fishing boat and the owner was forever caulking afterwards.
I should imagine that GRP would fare much better and steel is not a problem at all.
Aye // Stephen
|

|

|
 09-01-2009, 09:21 PM
|
#13
|
|
Moderator
Join Date: Jun 2007
Home Port: Washington DC
Vessel Name: SV Mahdee
Posts: 3,236
|

Quote:
Originally Posted by Nausikaa

It certainly appplies to wooden boats. Paint a white boat black or dark blue and the wood dries out opening the seams. I saw this happen on an old fishing boat and the owner was forever caulking afterwards.
I should imagine that GRP would fare much better and steel is not a problem at all.
Aye // Stephen
|
In hot sunny climates, depending upon wood species, the wood dries (with temperature and humidity changes in the environment) more if topsides are painted a dark color.
This doesn't necessarily change the strength of the wood hull but rather makes it unsightly because it becomes difficult to keep paint on the seams and the paying compound (like a window putty that goes over the fiber caulking) will simply dry out and fall out, too.
In cooler high latitudes, dark hull colors don't have the same detrimental impact on the wood as the moisture content doesn't vary nearly as much in the cooler weather.
If a boat is built with a wood that has much movement with change in moisture content, then it will likely have these problems, but if it is built with a very stable wood, not so much a problem.
Fair winds,
|

|

|
 09-02-2009, 04:19 AM
|
#14
|
|
Admiral
Join Date: Sep 2005
Posts: 1,619
|
Quote:
Originally Posted by redbopeep

In cooler high latitudes, dark hull colors don't have the same detrimental impact on the wood as the moisture content doesn't vary nearly as much in the cooler weather.
|
The effect in "cooler latitudes" maybe less but I witnessed the fishing boat case in Sweden. I would avoid painting a white wooden hull a dark colour anywhere.
Aye // Stephen
|

|

|
 09-02-2009, 10:37 AM
|
#15
|
|
Lieutenant
Join Date: Jun 2007
Home Port: Mackay
Vessel Name: Dreammaker
Posts: 64
|
Hi, Going back to roll and tip tech. I read somewhere on the net when I was looking at painting my boat, that the mix of the paint was critical. It was suggested that you paint a piece of glass and sit back and watch for runs as the paint levels out. If it doesn't smooth out then add thinner in a exact measured amount and paint the glass again. Until you have the right mix. But be careful don't thin too much.
Best of luck painting
Kevin
Ps You can check my paint job on my boat in the gallery
__________________
|

|

|
 09-28-2009, 08:16 PM
|
#16
|
|
Ensign
Join Date: Feb 2009
Posts: 7
|
As an FYI Coppercoat USA, LLC is selling Coppercoat here in the USA and it is fully EPA approved.
__________________
|

|

|
 09-29-2009, 06:18 AM
|
#17
|
|
Commander
Join Date: Oct 2007
Posts: 127
|
Hi All
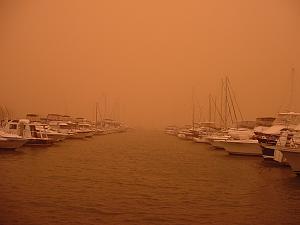
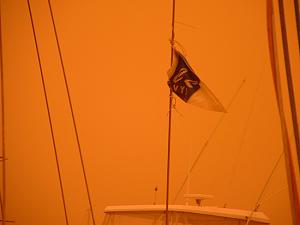
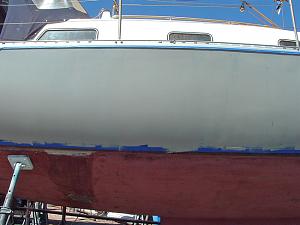
Well, 6 days into it. Nothing went well at the start. From an incredible dust storm to howling winds. We are finally well into the middle coats. I will now post some pics in order of operations. Then I will post some notes and observations.
The dust

CruiserLog burgee flying in the dust

Starting to sand

Sealer coat

Hi-fill coat

Observations are: really read the paint instructions. Be prepared to change your technique if it isn't working. You really need three people for this task.
Tomorrow will be top coat 1. This should settle the nerves as each paint so far has been different and required a different technique.
Will post again once the top coats are finished.
Cheers
Rob & Annette
S/V Blue lady
On the hard
__________________
|

|

|
 10-02-2009, 11:55 AM
|
#18
|
|
Commander
Join Date: Oct 2007
Posts: 127
|
Thngs have gone pretty badly. The suppliers gave us the wrong converter and the paint has streaked very badly. So the paint company has a rep arriving tomorrow to inspect the finish. We have now employed the shipwrights at the hardstand to rectify the mess. Very disheartening. Also very costly.
Cheers
Rob & Annette
S/V Blue Lady
__________________
|

|

|
 10-02-2009, 12:15 PM
|
#19
|
|
Retired Mod
Join Date: Mar 2007
Home Port: Durban
Posts: 2,984
|
That is terrible news. Let us know how it goes.
 : Most sections |

|

|
 10-04-2009, 04:40 AM
|
#20
|
|
Moderator
Join Date: Jun 2007
Home Port: Washington DC
Vessel Name: SV Mahdee
Posts: 3,236
|
Sorry to hear about your troubles. We hope that all can be worked out. Do let us know how it goes.
__________________
|

|

|
 |
|
|
Currently Active Users Viewing This Thread: 1 (0 members and 1 guests)
|
|
|
 Posting Rules
|
You may not post new threads
You may not post replies
You may not post attachments
You may not edit your posts
HTML code is Off
|
|
|
|
 Recent Threads
 |
|
|
|
|
|
|
|
|
|
|
|
|
|
|
|
|
|
|
|
|
|
|
|


 Linear Mode


